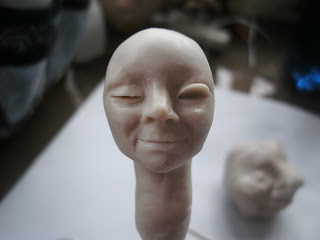
Well, after getting off to a roaring start there, I hit a snag.
My camera started acting odd - I took around 60 photos of adding the eyes, and sculpting the torso and shoulders, and it only 'saved' around 20 of them. This threw me a bit, and I've avoided both working on her, and blogging about it.
Using my trusty scalpel to cut the eyelids.
Normally I have quite steady hands, but at this point I always mysteriously get the shakes.
Whenever I need to get some symmetrical, I like to work upside-down. I find it makes it easier to gauge negative space, and helps me with keeping proportions steady.
She's looking a bit formless in the upper face...
Some small clay rolls to bulk out the under-brow.
When I was working on her, I decided forehead was too far back. looking at it now, I don't mind it so much...
Anyway, to correct this I slapped a pancake of clay in the middle of her forehead.
Which had the effect of making her hideous. (I've seen Nacho Libre too many times).
So, another bit of clay to fill in the bridge of her nose.
Smoothed on one side.
At this point, she looked a bit like my mother...
I used to have some very nice, proper clay shaping tools. Gods only know where they are now.
Currently, I use a sharpened eraser to smooth areas I can't fit my finger into.
Another improvised tool, a sharpened coffee stirrer. (I always grab one when I buy a coffee - they go straight into my bag.)
Gently inserting into the eye...
... and even more gently rolling up - this makes for a nice base for the eyelid.
Winking!
It's a bit rough, but the shapes will be corrected once the eyes are in.
This was the second-to-last photo on the memory card.
And then I sculpted the torso, hands and feet. And the ears. The bloody ears took me longer than the whole face. I hate bloody sculpting bloody ears.
I took LOTS of photos, I swear. Photos of making those bloody ears too.
But the last saved photo was this one. It's not even the last photo I took! This is after I brushed her down with Sculpey Clay Softener, and used the brush to really get into those tight corners. Then I patted the whole thing down with tissue, which gives the clay a nice 'tooth' for paint or what-have-you once it's cured.
She's now baked, so the next step is bulking out her body.


2 comments:
So nice to meet you through OWOH. Your tutorial is amazing!
: ) lulu
the process looks kind of odd to me, I think seeing a face becoming a face is a little jarring but once it's done, I'm sure it will be wonderful
Post a Comment