The camera has freshly charged batteries in it so I thought that I might as well document my process as I go too.
So, here you go, a photo-tutorial on making a doll...
 |
I'm not using any tinfoil in this doll, as it's quite small. Instead, I'm going to pad the cranium with the same masking tape that I'll be wrapping the wire armature in.
I've screwed one end of a length of tape into a (really) tight ball, then used the un-screwed-up end to attach to the wire.
Then I wrap the tape as tight as I can.
I didn't start with a long enough strip of tape, so I had to add more. No biggie, it just needs to be tight.
Just stuck it on top of the stuff already on there.
My armature with part of the wire covered with a layer of Masking tape.
I'm aiming for a pale ivory skin tone here, so I have half a block of (shock!) Ivory Sculpey, roughly-the-same-but-possibly-a-slightly-smaller-amount of SuperSculpey, and a slice of Pearl Du-Kit (Sparkly!)
Then I mush it all up and start mixing the colours.
By the time the colour is smooth, the clay is nicely conditioned too.
I take a bit of clay and squish into a thickish (about 5mm) pancake.
This is going to be the head, and it's nice to have extra clay on there, so I don't hit tape when removing clay later.
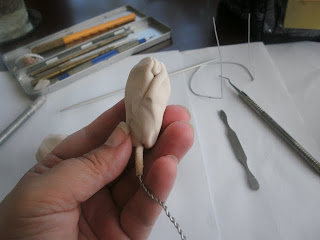
Enclosing the armature with the pancake.
Making sure that there are no airpockets.
Then I smooth and shape to a kinda Lightbulbish silhouette. In this photo I'm using a makeshift loop tool that I made from an X-acto handle and half a paper-clip.
("Kinda" was the keyword there...) The out-of-focus tools in this photo are: the aforementioned loop tool, a double-ended size 3 knitting needle, a dental scraper, and a nail-pusher from a manicure set.
Marking a centre line. This is to help with keeping the features symetrical.
A horizonal line for the eyes to go on.
Gouging out Eyesockets.
Two of them.
I haven't used as much Du-Kit in this clay mix as I normally would, and it's not as "stiff" as I'd like. It blends into itself beautifully though.
At this point in the process, my clay was really soft from being handled. Also, it's summer here and ridiculous hot - which makes the clay easier to mush around - the flip side of which is that it pushes out of shape with the slightest pressure.
So this is where I took a Coca Cola break (would've been coffee - but TOO HOT).
(Part 2 will go up tomorrow.)


No comments:
Post a Comment